Clay plastering
In the summer of 2020 we did what felt like the biggest job of the build, over 7 tonnes of plaster! We did some test patches to decide the mix that worked the best. Then mixed up 7 cubic meters of the stuff and shoved it on the wall.
Really though the clay plastering was a big job, tonnes of clay which had to be
broken up, soaked in a pit, run thru the concrete mixer, stored in a pit
again, mixed with sand, straw, hemp and horse manure with a honda
rotavator, then stored again for a few days, remixing on a tarp by foot and only then putting it on the
walls. 2 inches exterior and 3inches interior, phew!
 |
Test patches
|
 |
| Test patches were put on thick and thin to observe what happens |
The mix we went with in the end for the first coat was 1 1/2 clay, 1 sand, 1 1/2 straw
 |
Walls ready for plaster
|
Preparation
To get our walls ready for plastering we shaped the window surrounds with an electric strimmer to give a nice even curve.
 |
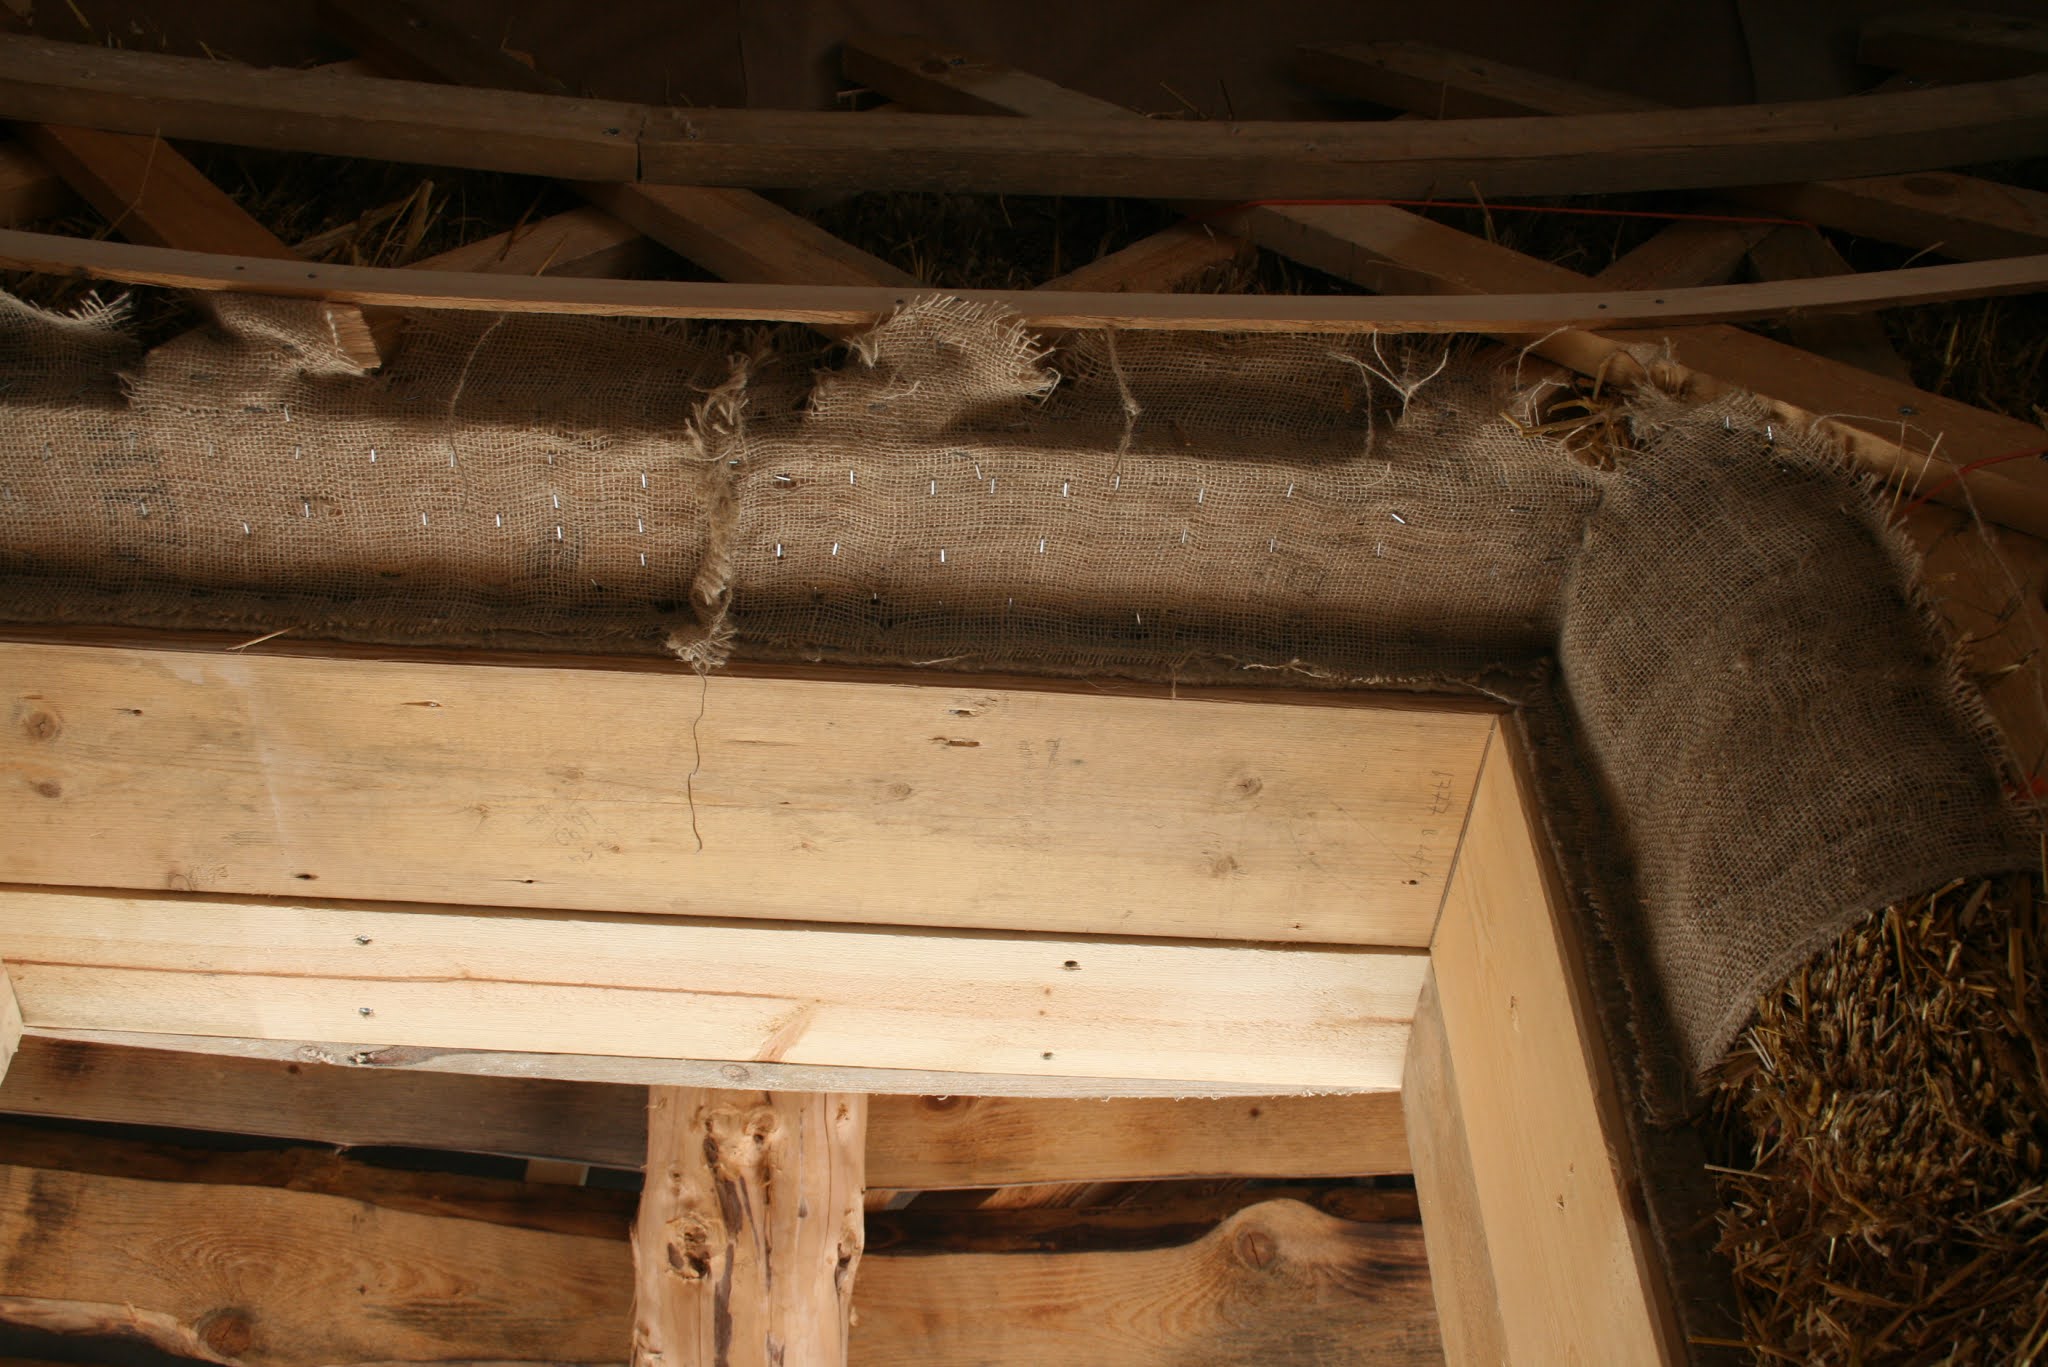
| Jute sacking stapled to the timbers which the bales are sitting on. |
|
At the head of the window we stapled old jute sacking to give the plaster something to hold on to. We turned the sacking down at the corners to minimize cracking here.
We stapled flax felt to the edges of the window frames and where the plaster meets the timber posts. The plaster will grip the felt and the felt is fixed to the timber, so this gives a flexible joint between these materials which will open and close some as the plaster shrinks on drying and the timber moves with shrinkage also.
The gap between the floor and the base of the wall we filled to stop the floor structure getting wet with dropped plaster etc. we used a mix of straw, clay and some hemp fibers.
The big gaps in the bales we stuffed with loose straw, which was twisted in the hand to make a little plug, and then pushed tight into the gap. Some of the holes we filled with a straw clay mix.
 |
Window frame with flax felt stapled on.
|
Originally we had tied baling twine through the wall and around the lattice inside and the vertical timbers on the outside to hold all the elements of the wall together. After talking to some people who had some questions about the the longevity of plastic twine, I decided to tie two rows of 3mm steel wire through the wall, we connected each loop of wire with a U shaped bolt connector. Hopefully this stuff will hold up.
 |
3mm thru wire with U bolt connectors to replace baling twine.
|
Mixing plaster
For the first coat we used the straw we had saved from strimming the bales earlier, when this ran out we just strimmed more in an old milk churn into about 5cm lengths.
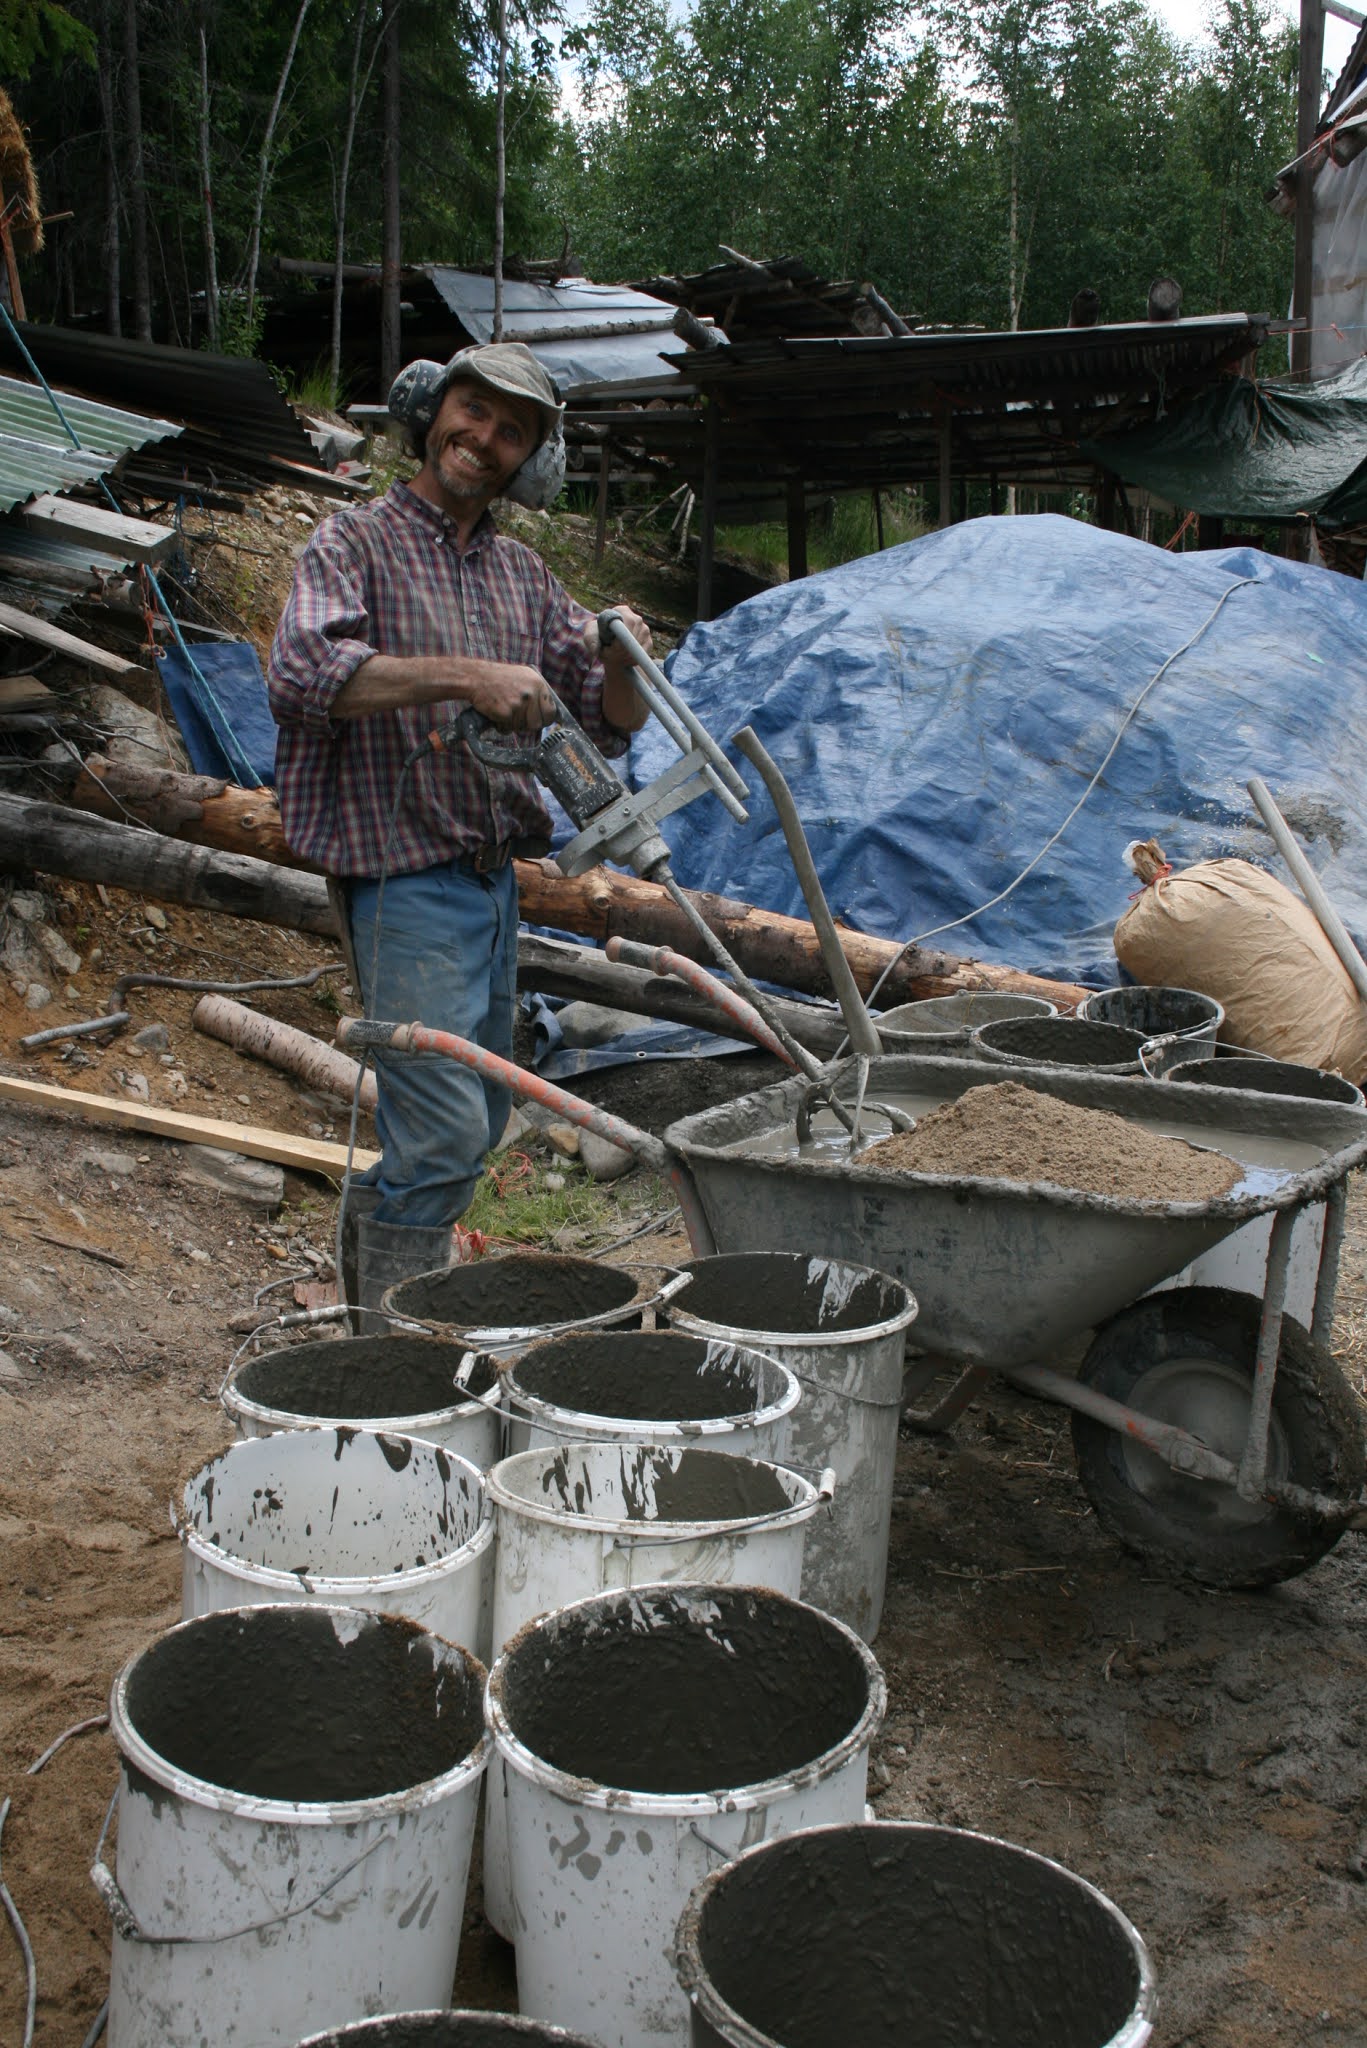
We made a mixing pit on our gravel road, this got deeper and deeper as we did more mixing.
The wet clay slip was mixed with sand in the wheel barrow and in buckets using a mixing drill. This was poured out on the ground of the mixing pit. The cut straw we then added in 3 stages to this, mixing it well in between each one.
 |
| Mixing sand and clay slip. |
|
|
1 mix has 160 liters of sand, 240 liters clay slip and 240 liters of chopped straw. We made 11 mixes for the first coat.
 |
Pouring in mixing pit.
|
 |
| Adding chopped straw. |
|
|
 |
Mixing with modified honda rotavator
|
The rotavator has two plywood wheels added to the outside, when i first tried the machine was pulling up lots of the gravel base and quite quickly digging itself into a hole.
 |
Shoveling mixed plaster onto tarp for storage.
|
The mixed plaster was left to mature for a minimum of 2 days, this gives time for the straw to rot just a little which makes it softer and so the plaster is easier to use. I read that the rotting straw gives some helpfull effects to the plaster; stickier so nicer to put on, and once dried it is more tough and a bit more water resistant.
Shoveling the mixed plaster was the most physical part of the mixing, so usually I got Marja muscles to do it! 2 mixes was enough to do in a day, we had 7 mixes ready before plastering began.
 |
| So whats next? |
|
|
Talkoot work gathering
To help with the plastering we organized a week long talkoot. 14 different amazing people came for different amounts of time and helped us with this big job, it would have been very difficult to get so much work done otherwise.
 |
Visa, Taina, Tiina, Pjotr, Pekka, Dennis, Karola, Huck, Marja and Mick. Photo taken by Kaisa.
|
 |
Covering timber with plastic.
|
We remixed the plaster from the storage pit by foot on a tarpaulin, the tarp is also pulled from the corners to turn over the mix. We added a small amount of fresh clay slip which seemed to liven up the plaster a bit and made it stickier.
 |
Remixing on tarp on the right is the ready mixed stuff.
|
The straw bales need to be coated with clay slip before applying the plaster. The slip should cover each strand of straw, we applied it by hand massaging it into the wall. We added some sand to the slip which to make it easier to pick up, it needs to be stiff enough that it stays in the hand and liquid enough that its easy to smear on the bale.
 |
Feet and legs mixing slip before using.
|
 |
Applying clay slip
|
The first coat on the interior walls is 5cm thick flush with the wooden lattice. There are no sharp corners in the plaster as it would chip and the curvy shapes are much nicer looking.
 |
First day of talkoot.
|
 |
Marja plastering above window opening.
|
 |
Tiina adding more staples to jute sacking at window.
|
 |
Clay slip pit dancing.
|
 |
More clay being broken up ready for the soaking pit
|
 |
Washing pit.
|
 |
Exterior rendering.
|
In the 7 days of the talkoot we got the inside first coat finished and the exterior started on the last day. Over the next couple of weeks we got all the exterior first coat finished.
Preparing for second coat.
On the exterior where the floor meets the wall there is no straw bale so we needed to add a surface to put the plaster on. We used plaster lath, which is thin pieces of wood with a space between each piece so some of the plaster squeezes through and around the laths and the plaster kind of hangs from this.
 |
Trim and lath ready for render.
|
To protect from damage at the base of the wall we bent 25mm x 50mm aspen trim. The top and bottom are sloped to shed water. We first soaked the pieces in water for a few days, then clamped them in a form and allowed to dry. The form is made so the pieces are over bent by 15%. I used an electric fan to speed up the drying so I would be able to fit them before the second talkoot.
We also fitted the windows which really changed the house, no longer could a gust of wind be heard in the trees.
 |
| Form for bending aspen trim. |
|
|
 |
| 200mm pipe for soaking aspen trim |
For the second coat we made a mix consisting of 1 sand, 1 1/2 clay, 1 straw, 1/2 hemp and 3/4 horse poo.
 |
| Second coat test patches. |
|
Second Talkoot
For doing the second coat on the exterior we organized another week long talkoot (we don't have pictures). We got the outside render finished in the week, some of the people from the first talkoot came back to help again. Thank you all so much.
The second coat is a bit more work as it needed to be finished. We first wet the wall down with a hand sprayer, applied the plaster using hands then flattened it out using a wooden trowel. Each day we started from where we finished the day before, in this way the joint from the new plaster to the old is easier to conceal as the older stuff has not dried out too much.
Interior plaster
Over the next couple of weeks Marja did the finish coat on the interior while I tried to keep ahead of her fitting the window boards. Marja explains below what she did.
For the interior plastering it was important to plaster the whole section between two posts (otherwise there would have come a visible line of where the plastering was finished one day and started the next day). This meant a long day of plastering. I got everything ready the day before so that the day of the plastering I would only need to remix the plaster and then start plastering. Before plastering the wall needed to be sprayed wet. That took a surprisingly long time.
For the second layer it was more important that the result would look good since we will be looking at it for ever. It took some practice to make the finish look good. Also there was not much time from when the plaster was put on the wall to when it was too dry to smooth. After wetting a small area the plaster was placed as thick as needed in the small area. Then this area was smoothed a bit using a wooden trowel. This would be repeated in about four small areas and then it all was smoothed the final time. The more time I had the more precise the end result was. Marja.
 |
An oat grain sprouting in the plaster.
|
 |
Mummified rat on temporary display in our truth window.
|
 |
Some nicely shaped pieces from a pine tree stump set in the plaster.
|
We plastered the last wall in October and it was the wall with the pine stump pieces in it, which meant the plaster went on quite thick about 5cm. Also now we had the windows closed to be able to heat the house. This made this wall very slow to dry, after a couple of months it still looked wet so I used an electric fan to get it dry.


This is marvellous huge work well done
ReplyDeleteWell Michael and Maria your home appears to be reaching completion has the covid lock down been a help or hindrance? Winter is coming here in Aus so days cool and shorter. Keep well xx
ReplyDelete